Afiq gave me these for Mother's Day today. Well actually he gave one for me and one for Shahril. I am deeply touched particularly because he has been very careful with his pocket money this year. When he started Year 2 this year, he had RM 4 in his wallet and that RM4 was actually fom last year's pocket money.

Ever since he started school I made sure he brought 'bekal' to school every day. For me, It's more about instilling the habit than saving money. Last year he would normally spend RM 1 of his pocket money on (sweet ) drinks.

When he started Year 2 this year, I told him that it's ok if he wants to spend money once in a while on anything that he likes, but not everyday. To my surprise, the first month of school went by without him spending a single ringgit!

The only time he used his pocket money so far, was to contribute to his class collection of money to buy a gift for the Headmaster when he was transferred!

Then a friend came to visit last month, and gave Afiq RM5 'duit belanja'. Even then, he had somehow managed not buy anything.

Last Friday, I had to wait a few minutes longer than usual when picking him up. He got in the car and apologized. (I didn't realize the wait, to be honest). But I asked him the reason he felt he was late anyway. "Abang pegi kedai buku tadi, Abang beli sesuatu untuk Mama. Ahad ni kan Mother's Day.. Abang ada surprise untuk Mama!"

I choked.

Afiq, I hope you'll grow up to always be thoughtful like this. Please know that it doesn't matter what it is that you buy, and it never will... but it's your thoughts that really count. They may seem small to you, but moments like these mean the world to me. There will never be a day in my life without my do'a for you. Semoga Allah sentiasa menjaga hati, menguatkan iman, melindungi Afiq dari apa jua kemungkaran. Doa Mama semoga Allah melimpahkan rezeki, memanjangkan umur dan semoga kita sentiasa dalam rahmatNya. What a fine man you will be, sayang. InsyaAllah.


I found this recipe in my quest for ehem, healthier food. The best thing about this is, it's so simple to make and is just sooo delicious, I foresee myself making this again and again as I think this is quite perfect for Afiq's bekal to school. Oats and dates, nutritions wise.. Do I need to say more?


Got the recipe from here

Ingredients:

2 1/2 cups sifted all-purpose flour*

2 1/2 teaspoons baking powder

3/4 teaspoon salt

1/2 cup quick rolled oats

1 package (8 ounces) dates, chopped - about 1 1/2 cups of chopped dates.

1/2 cup brown sugar - I put less than 1/3 of a cup

1/2 cup granulated sugar - - I put less than 1/3 of a cup

1 egg

1 1/4 cups milk

3 tablespoons melted butter

1 teaspoon vanilla

Preparation:

Sift flour, baking powder and salt into a large bowl; add sugar.

Stir in oats and dates.

In a separate small bowl, beat egg with milk; stir in melted butter and vanilla. Add to flour mixture and stir until evenly moist.

Pour mixture into a greased 9 X 5 X 3-inch loaf pan. Bake at 350° for 55 to 65 minutes ( I baked it at 160 C for 60 minutes), or until a toothpick comes out clean when inserted in center. Once the loaf has cooled, wrap and store overnight for best flavor.


Note: although I have reduced the sugar used, I would have liked it better if it was less sweet still. So the next time I make this, I'll reduce the sugar even more and probably add more oats.


The before picture


Once it's out


I first wrote this on Afiq's birthday, which was on April 16th. Every time I try to write something so close to my heart, I find myself lost for words.
------------------------
Afiq turns 8 today, Alhamdulillah. How time flies, it surely doesn't feel like it has been 8 years since I laid eyes on him.
I look at him now and I am amazed at how precise he is to my imagination of how I would dream my first born to be and more. I look at him and I know I'm blessed. I look at him and I feel overwhelmed with emotions. Love, pride and now that he's 8, I am more worried about my ability to be the mother he needs; to guide him to be successful not only in this world but more importantly in the hereafter.
May Allah guides us to be the best we can be.
Happy birthday, Afiq. Doa Mama Afiq selalu dalam lindungan Allah, membesar menjadi insan soleh yang cerdik pandai, beramal soleh.
For his birthday, I wanted to bake something he loves. Well, he is my number 1 fan when it comes to my baking. Breads, muffins, cakes - most of the time he would be the most excited one. So I wanted this cake to be extra special.
He loves Oreo. Really, really loves Oreo. So I searched for Oreo Cake Recipes. Most results I found were Oreo Cheesecake, though. I finally stumbled upon this recipe and thought it looks simple enough.
OREO CUP CAKE
From Ita Masam Manis
250 gm butter
1 cwn gula
2 cwn tepung naik sendiri - I used tepung kek
1 sudu kecil baking powder - tepung dan baking powder diayak
4 biji telur
1 sudu kecil esen vanilla
8-10 keping oreo - kisar halus
Campurkan butter, gula. tepung, baking powder, telur dan esen vanilla dan pukul selama 2 minit. Jangan terlebih pukul ye!
Campurkan oreo dan kacau rata.
Tuangkan adunan dalam paper cup. Susun atas tray
Bakar dalam oven dgn suhu 170C selama 10 - 15 minit atau sehingga masak.

* Note: Since I used this recipe to make a cake instead of cupcakes, the method I used is slightly different:
Pukul butter dan gula sehingga kembang. Masukkan telur satu persatu. Masukkan esen vanila. Masukkan tepung. Bakar dalam oven pada suhu 170C sehingga masak.

Note: the first time I made this cake I used 2 x 7 " pans. It took around 45 minutes since the cake was quite thick. This morning I used 2 x 9" pans instead and it took around 30 minutes.

For the buttercream, I used this recipe from here: buttercream
BUTTERCREAM
250 gm butter
250 gm krimwell
125 gm gula icing
200 gm golden syrup
Pukul butter dgn krimwell hingga putih. Ayak gula dan masukkan ke dalam butter dan pukul hingga licin. Gunakan speed perlahan.
Bila sudah licin masukkan golden syrup dan pukul dgn speed laju hingga adunan putih dan creamy.
Note: I also added a cup of crushed Oreo to the buttercream.


Alhamdulillah, the cake turned out very very good! It was so good that Shahril told me I should bake it again when we had a small makan-makan just 4 days after I baked the first one!

Alhamdulillah, once again it was a huge success. It was so good, my sister-in-law wanted to order it for her birthday in August! Alhamdulillah.I was so busy being a host, I didn't get to take lots of pictures.

I am really happy with this cake. I have baked quite a number of cakes, and I am not really a cake person, so my expectation of a cake is rather high. This is the first cake I feel confident enough to sell, so when a few friends asked whether they can order this from me, I gathered my guts and said yes.
So the very next day after we had our 2nd Oreo Cake, I baked this for a dear friend.


Alhamdulillah. I hope this will be a blessed new adventure for me.


The actual intent of this post is to test an app I just bought called Blogsy.

Muiz was obviously not as excited as I was at Yummie. He fell asleep 10 minutes after I stepped into the shop. :)

* Can't imagine what it would be like without my Snuggbaby.


We celebrated Shahril's birthday a few days earlier since we were at my MIL's. Shahril wanted a simple cake, so I made this Victoria sandwich cake.

The recipe is from:The Kitchen Guardian

250g butter, leave soft
250g caster sugar, I used 220g because I added golden syrup - me too
5 large eggs
1 tsp vanilla extract
1 tbsp golden syrup
2-3 tbsp milk
280g self-raising flour

Method
Preheat oven at 170C.

Cream butter and sugar and vanilla until light and fluffy. I used my wooden ladle! Add eggs in three additions. Lastly add srf in 3 additions, fold in milk until incorporated.

I used 3, 7 inches round cake tins...and I liked them! Bake for about 30 minutes until golden in colour.

Let cool and sandwich with Raspberry jem, and sprinkle sugar on top!

* I don't have raspberry jam, so I used strawberry jam instead.

The verdict: in my honest opinion, the cake is pretty ordinary. It's basically just a simple butter cake albeit a little dense which I think is from using the milk and golden syrup. But, here's the but: what makes it really special is the jam. The tangy and sweet strawberry jam brings the best out of this cake.

Everyone loves this cake. The kids, the elderly, everyone Alhamdulillah.


Labels: 1 comments | edit post
I've heard about donat kentang quite a while ago. A colleague raved about how good a donat kentang tastes. I remember looking for the recipe, but I was turned off by the fact that it requires 4 egg yolks to make!

I totally forgot about it after that, until recently when I was about to bake a cake for Mariessa's birthday celebration at school. The cake recipe calls for 5 egg whites and I wondered what I could use all the egg yolks for. Started googling and came across the donat kentang again. I was thrilled, like finally, I have a good reason to try it!

Of course, there are a lot of variations of donat kentang recipes on the net, but this one seems to be the most talked about. You can google for 'Donat Kentang Fatmah' and see just how many people have tried this recipe.

I got mine from This blog

Donut Kentang

Bahan-bahan
500 gram tepung berprotein tinggi/gandum - I used tepung gandum
50 gram susu tepung
11 gram yis kijang - I used instant yeast (mauripan)
200 gram kentang, kukus, haluskan dan dinginkan - instead of kukus, I just rebus 2 medium size potatoes. Lenyekkan and biarkan sejuk.
100 gram gula pasir
75 gram mentega/marjerin
½ sudu kecil garam
4 biji kuning telur - I had 5, so I just threw all 5 in. Why waste, kan? Hehe
100 ml air sejuk dari peti ais

Cara-caram
Dalam mangkuk besar, satukan tepung gandum, gula, susu tepung, yis dan digaul rata.

Masukkan kentang halus, kacau rata dahulu sebelum dituang telur dan air sejuk. Uli hingga rata dan setengah elastik.

Selepas itu, baru dimasukkan mentega dan garam, uli terus hingga menjadi elastik. Rehatkan selama 15 minit.

Bahagi doh kepada 50 gram dan dibulatkan licin. Rehatkan lagi selama 15 minit sehingga mengembang.

Buatkan lubang di tengah tengah dengan gerakan memutar dan segera digoreng dalam minyak sederhana panas sehingga berwarna kuning keperangan.

Angkat dan toskan. Tabur dengan gula kaster atau hias dengan coklat.

** What I did was, as always, I just put everything into the bread maker. I have to admit that I have some doubts I the beginning. The dough looked keras (in the beginning) and it looked as if the bread maker was struggling to knead. I contemplated adding more water but I decided to wait. Lucky I didn't, because after 15 minutes of rest after kneading, the dough was just perfect. In fact, when I was taking the dough out of the bread maker, I was really surprised at how soft and yet firm the dough was. Must have been the butter and the mashed potato. A nice dough to work with, really.

By the way, the bread maker takes one and a half hour to finish the whole process. The first half hour is for kneading and the hour after that is for the dough to rise. I let this dough to rise for only 15 minutes as I was pressed for time - I started the whole process at 5 a.m and I need to have the donuts ready before Afiq leaves for school at 6.45 a.m. Instead of shaping the donuts 'manually', I use the donut cutter.

This recipe yields a lot of donuts - 28 large ones in my case ( it depends how big and thick you make it). So I keep half of it frozen after frying it lightly. Oh and the most tricky part of the whole process for me is actually frying the donuts. I started with medium heat and even then the donuts turned brown in a split second.

After tasting this donut, I honestly think the 'regular' donut will seem very plain and boring. Hehe.


Labels: 0 comments | edit post
Now that I'm staying home, this is one of the luxuries I get to enjoy more;

Watching my child(ren) sleeping.


                         " There was never a child so lovely but his mother was glad to get him to sleep.
Ralph Waldo Emerson "

Labels: 0 comments | edit post

I do realize that all I blog about these days is about my 'culinary' adventures. I don't mean it to go that way, but the truth is, writing about the things I cook require the least words and time! I mean, I just copy the recipe and paste it here, put up a picture or two and wallah, it's one entry done!

I have so much to write about the kids, I will make sure I do, but for now let's just take about pretzels first, shall we?

Afiq lovessssss Auntie Anne's pretzels. I do too, but not as much as Afiq does. So one day, during my shopping trip at Yummie, I came across a bottle of caramel sauce, and I thought, hey, I can try making pretzels and eat them with the caramel sauce. I don't know why I thought making pretzels is easier than making the caramel sauce, but my brain is complicated that way.

So I bought that bottle of caramel sauce and finally attempted at making pretzels yesterday.

For me, beside searching for the recipe with the most positive reviews, watching a few videos on how to twist the pretzels is important too prior to making the pretzels. It will help a lot when you're making the pretzels, so I would recommend that you do that too.

-------------------------------
I used the recipe from CDK KITCHEN
Aunt Annie's Soft Pretzels
serves/makes: 12

ingredients:
For the pretzels
1 1/2 cup warm water
1 1/8 teaspoon active dry yeast
2 tablespoons brown sugar
1 1/8 teaspoon salt
1 cup bread flour
3 cups regular flour

For the soda bath:
2 cups warm water
2 tablespoons baking soda

For toppings:
to taste coarse salt
4 tablespoons butter (melted)

directions:

Note: as usual, I used my bread maker, so I just put all the ingredients for the dough into the breadmaker for it to do its magic.

I noticed that the dough was a little sticky, so while the bread maker was kneading I added a few spoonfuls more of flour.

The 'manual way':

Sprinkle yeast on lukewarm water in mixing bowl; stir to dissolve. Add sugar, salt and stir to dissolve; add flour and knead dough until smooth and elastic. Let rise at least 1/2 hour.

While dough is rising, prepare a baking soda water bath with 2 cups warm water and 2 Tbsp baking soda. Be certain to stir often. After dough has risen, pinch off bits of dough and roll into a long rope* (about 1/2 inch or less thick) and shape. Dip pretzel in soda solution and place on greased baking sheet. Allow pretzels to rise again. Bake in 450 degrees F oven for about 10 minutes or until golden. Brush with melted butter and enjoy!

Toppings: after you brush with butter try sprinkling with coarse salt. Or for Auntie Anne's famous Cinnamon Sugar, try melting a stick of butter in a shallow bowl (big enough to fit the entire pretzel) and in another shallow bowl make a mixture of cinnamon and sugar. Dip the pretzel into the butter, coating both sides generously. Then dip again into the cinnamon mixture. Enjoy!

* The longer and thinner you can make the dough rope, the more like Auntie Anne's they will be. (Of course I don't have the counter space!)

*Sweet butter, not regular butter, is one of her secrets!

---------------------------------

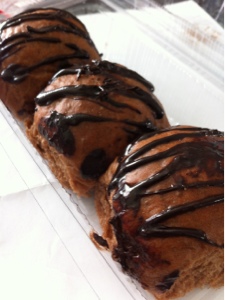
The pretzels turned out really good. As suggested in the recipe, the longer and thinner you can make the dough rope, the more like Auntie Anne's they will be. I find it quite tough to make it really thin, as it will be more fragile especially when dipping them into the soda bath, but I think it's just a matter of skills (or lack of in my case, hehe).

The most interesting part of my pretzels story is however this: remember that bottle of caramel sauce I bought? I open it as soon as my pretzels were ready... And oh my god, it tastes horrible! Extremely terrible! Macam ubat gegat! Not that I've tasted ubat gegat before, but it sure smelled the same.

I ended up making my own caramel sauce (after quickly googling it). The best thing is, it only took me 5 minutes to make it! Ironic, isn't it?

Here's the recipe for the caramel sauce adapted from here

caramel sauce dipping:
1/2 cup granulated sugar
1 tbsp water
1/4 cup heavy cream, room temperature - I didn't have heavy cream, so I used whipping cream instead.
1/4 tsp salt
1 tsp butter

- it was a little thick (maybe it was because I was using whipping cream instead of heavy cream, so I added a few spoons of water)

directions:
put sugar and water in a heavy based saucepan. heat until it becomes dark amber color.
add in salt, pour in heavy cream (it will bubble like mad), stir until smooth and even color. remove from heat. let cool for 5 minutes.
add in butter, stir evenly.


Labels: 0 comments | edit post
I attempted making pizza once or twice before but I've never been satisfied with the outcome. But today a good friend shared a recipe she's happy with and I thought I really should give it a try. Oh I am sure glad I did, 'coz it was so good!

Here's the recipe:

Pizza Crust

2 1/4 tsp active dry yeast
1/2 tsp brown sugar
1 1/2 cup warm water
1 tsp salt - I used garlic salt instead, for extra taste. 😉
2 tbsp olive oil
3 1/2 cups flour - I used high protein flour, but I noticed that the dough was very sticky. So I added flour little by little into the breadmaker while it was kneading until it was no longer sticky. I think in the end I used almost 5 cups of high protein flour. Will properly measure this next time.

The 'manual' way:

1. Dissolve brown sugar + yeast + warm water in large bowl - leave 10 minutes

2. Once yeast has bubbled, stir in salt and olive oil. Mix in 2 1/2 cups of flour

3. Turn dough out onto clean surface and knead in more flour until dough no longer sticky. Place into well oiled bowl and cover with damp cloth. Leave dough to rise to double its size - est 1 hour.

Punch down the dough and then form into ball. Let it rest for a minute before rolling out and topping it

4. Preheat oven to 220 degrees and bake for 15-20 minutes.

My way: dump everything into the breadmaker and wait. 😊

I ended up with a huge dough (5 cups of flour, of course!). So I used only half of the dough and kept the remaining in the freezer for the next pizza craving time. Even with half of the dough, I get to make 2 huge, thin crusted pizzas.

Note: For the sauce, used leftover bolognese sauce.
For the topping, I added thin slices of chicken sausages and chicken meatloaf. And of course lots and lots of mozzarella cheese.


Labels: 0 comments | edit post
I totally forgot that I've not blogged about this. It's really not a big deal really, but the problem is I have collected so many recipes that by the time I want to do something I have done, I would have forgotten which recipe I have used. So, before I forget again, let me just blog about this.

I made this a couple of weeks ago, I think. This yields quite a lot of buns, so it's good if you have guests coming over.

Bun Coklat
Resepi asal from: http://www.tiffinbiru.com/2008/01/bun-coklat-kak-liza.html


Bahan-Bahannya :-)
500 g tepung berprotein tinggi
30 g tepung susu
20 g serbuk koko
100 g gula halus
11 g dry instant yeast
1 camca teh bread softerner (optional)
1 biji telur, dikacau dengan garfu
1/2 camca teh garam
250 ml air
80 g mentega

100 g Milk coklat untuk hiasan (tiada dalam resipi asal) - I didn't use this, but I used the same recipe for chocolate ganache as I have used for chocolate cake instead:

For the chocolate ganache:

150gm cooking chocolate - I used Beryl's dark chocolate
1 sudu besar susu pekat
1/4 cawan air panas/susu cair - I used fresh milk
1 sudu besar butter


Cara membuatnya :-)
UNTUK DOH :-) Satukan semua bahan dalam mangkuk adunan, kecuali mentega, uli hingga menjadi doh. Tambah mentega dan uli hingga mentega sebati dan doh menjadi kenyal, licin dan anjal. Masa menguli kurang lebih 25 - 30 minit.

KAEDAH LAIN :-) Satukan semua bahan2 dalam bread maker, pilih setting for dough, tekan dan tunggu hingga siap.

UNTUK BUN COKLAT :-) Keluarkan doh, tumbuk untuk membuang udara, uli 5 minit dan bagi2kan doh pada saiz yang diingini, timbang untuk mendapatkan saiz yang sama besar. Bulat2kan dan susun atas loyang yang telah digris dengan mentega. Biar naik sekali ganda (kurang lebih 45 minit).
Bakar dalam oven pada suhu 200C selama 25 minit. Bila roti masak, keluarkan dari oven dan sapu permukaannya dengan mentega. Alih roti atas jaringan dan biarkan sejuk.

Untuk membuat choc ganache: masukkan coklat masakan yg dipotong kecil2, susu pekat dan air panas/susu cair kedalam periuk dan masaklah cara double boiler hingga cair. Padam kan api dan masukkan mentega. Kacau hingga mentega cair. Biarkan seketika sepatah ganache tidak terlalu cair.


Labels: 0 comments | edit post
I've been wanting to bake cinnamon rolls for so long, but I just didn't have the push to do it. But when a dear friend asked me if I could bake some cinnamon rolls for her, I knew it was a sign that I really should try it. I couldn't bake these for the friend due to time constraint at the time she wanted to order, but I sure hope I could make it up to her one day.

Actually, the last time I ate a cinnamon roll was when I was still in high school! That must have been in 1994 or 1995! There was a fast food outlet in Seremban called The White Castle if I'm not mistaken, and they served really really yummy cinnamon rolls! So, in actual truth I am a little scared of baking this as I'm afraid I'm going to be disappointed since I remember loving the ones I had back in Seremban.

But I woke up this morning and I knew I just had to do it!

Searched the Internet (where else, these days) and found one recipe that seems to be a favourite among bloggers.

I'm sharing the recipe here, with some remarks based on what I did.

Cinnamon Rolls
Resepi asal: http://www.myresipi.com/top/detail/256

Bahan-bahan ( 10 biji ) - I made 12 instead

= Bahan utk Roti =
300g tepung roti
50g butter
1 biji telur
50g gula halus
100ml fresh milk/air (room temp)
8g dry yeast
1 sudu kecil garam
-----------------------------------------------------
= Filling =
2-3 sudu kecil cinnamon powder (ikut suka ) - I don't want the cinnamon to be too strong, so I put just a tea spoon of cinnamon ground instead. It turns out just nice for me.
60g gula perang
20g butter-suhu bilik
-----------------------------------------------------
= Icing =
50g cream cheese - suhu bilik
20g butter - suhu bilik
100g gula aising
secubit garam
beberapa titik vanila esen

I didn't use all of the cream cheese frosting. In fact I used probably only a quarter of it and it was sweet enough for me. So maybe you can make only half of this cream cheese frosting recipe.

Cara-cara

Cara buat roti: I used my breadmaker, so if you do too, just put all the ingredients for the bread into the breadmaker (liquid first, then the dry ingredients). Set the function to dough and wait for one and a half hour. Hehe.

---If you're doing this by hand (oh my respect goes to you!), here's the cara2.

Gaulkan butter dengan tepung sehingga jadi macam serbuk roti
Kemudian masukkan gula dan dry yeast. Kacau dengan sudu sehingga bergaul rata.
Masukkan pula garam, telur dan susu. Uli sehingga tak melekat ditangan atau sehingga licin.
Wrap dengan plastik/ kain lembab. Biarkan naik sehingga 1.5 kali ganda. Bila dah naik, buatkan bentuk bulat sekali lagi dan rehatkan selama 10 minit.

---Once the breadmaker has done its job;

Bahagikan doh kepada 2 bahagian. Ambik 1 bahagian dan canaikan lebih kurang 20x25cm. Letakkan bahan-bahan filling.
Kemudian gulung. Bahagikan pula kepada 4 bahagian kecil( lebih kurang 4 cm panjang). Ulang untuk doh yang sebahagian lagi.

--- What I did was, I divided the dough into 2, and once I put in the filling and roll it, I cut it into 6. Repeat with the other half of the dough.

Lapikkan roti dengan muffin cup. Biar naik 1.5 kali ganda lagi. Bakar dengan suhu 180C selama 15 minit.


Sementara itu sediakan aisingnya. Masukkan semua bahan-bahan untuk aising ke dalam mangkuk. Pukul sehingga jadi bentuk krim.
Bila roti dan masak( ketika masih panas), letaklah aising 1-1/2 sudu besar ke atas setiap roti. Jangan letak terlampau banyak aising. Aising yg banyak boleh menghilangkan kesedapan rasa roti.


The verdict: Oh sooo yummy! I took the first bite and I was all yummmmmm-pejam pejam mata! I might try adding raisins the next time since I think The White Castle's cinnamon rolls had raisins in them too.

Labels: 0 comments | edit post
It seems that all I ever talk about these days is food isn't it?

Well, last week one of our neighbours gave us some bananas her husband had planted along the roadside near our area. Hmm, tak tau la pulak pisang apa, at best I can tell you is that it wasn't pisang emas, hehe.

So I decided to make this cake and share some with them. The cakes ( I made 2) turned out really good, Alhamdulillah.

The recipe is from:

http://ummizaihadi-homesweethome.blogspot.com/2012/01/banana-chocolate-rice-cake.html

BANANA CHOCOLATE RICE CAKE
Resepi & Sumber : Buku Lovely Butter Cakes oleh Amy Wong & KS Lee
Dicuba Rasa & Terjemahan: Ummi @ Home Sweet Home

Bahan A:-
150 gm marjerin ( I used butter)
150 gm gula kastor (I reduced this to about 135g)
3 biji telor
100 gm susu segar
100 gm pisang ranum yang dilecek (I put in about 150g)
Bahan B:-
200 gm tepung berprotein rendah (I used self raising flour))
30 gm chocolate rice
1/4 sudu teh soda bikarbonat
Hiasan:-
2 biji pisang ( dipotong nipis bulat) - didn't put this
1/4 cawan hirisan badam ( I have some almond nibs, so I put those instead)

Cara-Cara:-
Pukul marjerin (mentega) dan gula hingga nampak keputihan.
Masukkan telor satu per satu (*pukul telor hingga bercampur rata, baru dimasukkan yang berikutnya.) Pukul hingga sebati.
Secara berselang seli, masukkan bahan B dan susu, adun rata.
Perlahan-lahan masukkan pula pisang lecek dan gaul sebati dengan spatula.
Tuangkan ke dalam loyang saiz 8x3x3 inci yang telah digris dan dialas
Ratakan adunan dan susun hirisan pisang di atasnya. (Didn't do this, but tabur almond nibs instead)
Bakar dalam oven yang telah dipanaskan terlebih dahulu pada suhu 170C selama 40 minit/hingga masak.

I actually doubled the recipe since I wanted to give one to that neighbour. I love it when the whole house smells of banana. This is definitely something I will bake over and over again.


Labels: 0 comments | edit post
My youngest brother's birthday is a day after my eldest sister's, so after the lemon cake we had the other day, I thought this cake is the opposite, hence appropriate. I wrote this recipe before, but I'm just going to put it here again for easy reference.

BLACK BEAUTY CHOC. CAKE

Ingredients (A) :
2 cups flour (I used self raising flour)
3/4 cups cocoa powder
2 teaspoons bicarbonate soda
2 teaspoons baking powder

Ingredients (B) :
2 cups castor sugar ( I reduced this to about 1.5 cups)
1 cup evaporated milk (I used fresh milk)
1 cup cooking oil or melted butter
1 cup lukewarm water
1 tablespoon chocolate emulco - I didn't have this, so I omitted
3 eggs

Method :
1. Sift together all ingredients in A. Set aside.
2. Mix well all ingredients in B.
3. Pour ingredients B into A and mix well.
4. Bake in a preheated oven at 180 C for 50 minutes to 1 hour. Oven temperature and time of baking may differ.

For the chocolate ganache:

150gm cooking chocolate - I used Beryl's dark chocolate
1 sudu besar susu pekat
1/4 cawan air panas/susu cair - I used fresh milk
1 sudu besar butter

Untuk membuat choc ganache: masukkan coklat masakan yg dipotong kecil2, susu pekat dan air panas/susu cair kedalam periuk dan masaklah cara double boiler hingga cair. Padam kan api dan masukkan mentega. Kacau hingga mentega cair. Biarkan seketika supaya ganache tak terlalu cair masa curah atas kek.

My kids really like this cake, Alhamdulillah. What I really love about it, is how simple it really is to bake .


Labels: 3 comments | edit post
I've been wanting to bake this for a while. I even watched the video on making this on You Tube several times in anticipation of doing it. Finally found the perfect reason to bake it yesterday. Not that I needed a reason to, but it made it extra special.

I used the recipe found on Joyofbaking. Divided the batter into 2, one for my sister and another one for Mariessa's teacher.

Lemon Cake Recipe:

1 cup (230 grams) unsalted butter, room temperature
1 cup (200 grams) granulated white sugar
1 teaspoon pure vanilla extract
4 large eggs, room temperature
Zest of 1 large lemon (outer yellow skin of lemon)
2 cups (260 grams) all purpose flour
2 teaspoons baking powder
1/4 teaspoon salt
1/4 cup (60 ml) fresh lemon juice

Lemon Frosting:

1 cup (115 grams) confectioners' (powdered or icing) sugar, sifted
2 - 4 tablespoons fresh lemon juice


Lemon Cake: Preheat oven to 350 degrees F (180 degrees C) and place oven rack in the center of the oven. Butter, or spray with a non stick cooking spray, a 9 inch (23 cm) spring form pan and then line the bottom of the pan with parchment or wax paper.

In the bowl of your electric mixer (or with a hand mixer) beat the butter and sugar until light and fluffy and pale in color (about 3-4 minutes). Scrape down the sides and bottom of the bowl as needed. Beat in the vanilla extract. Add the eggs, one at a time, mixing well after each addition (batter will look curdled).

Sift or whisk together the flour, baking powder, salt, and lemon zest. Add the flour mixture (in three additions) alternately with the lemon juice (in two additions), mixing until you have a smooth batter.

Pour the batter into the prepared pan, smoothing the top with the back of a spoon or an offset spatula. Bake about 40 - 50 minutes, or until a toothpick inserted in the center comes out clean. (Do not over bake or the cake will be dry.) Place on a wire rack to cool for about 15 minutes, then gently remove the sides and bottom of the pan.

Lemon Frosting: Place the sifted confectioners sugar in a small bowl. Add 2 tablespoons lemon juice and stir until you have a thick and smooth glaze. Add more lemon juice or powdered sugar, as needed. Pour the frosting over the top of the cake, allowing it to drip down the sides. Let the frosting dry before covering and storing. This cake will keep for several days in an airtight container.

Makes one - 9 inch (23 cm) cake.

Read more: http://www.joyofbaking.com/LemonFrostedLemonCake.html#ixzz2K6QLC5KV

I love the tangy lemon flavour in this cake. The glaze is a little too sweet for me though. I think it's already perfect on its own.


Labels: 0 comments | edit post
To avoid the part that I hate the most in cooking i.e. thinking of what to cook, I plan the menu on a weekly basis. Okay I actually drag everyone to the small white board I have in the kitchen and ask them what they would like to eat next week. This is done either on Friday night or very early on Saturday morning before we go to the pasar tani.

Panjangnya mukaddimah cerita cekodok.

Aaanyway, last week Shahril put in cekodok (pisang) as today's breakfast. (When we were small, my brother called this cucur hitam for obvious reason. So yesterday, we went looking for bananas, and Shahril bought a huge bunch of it.

The nice guy that he is, he even mashed the bananas and keep it in the fridge before we went to bed. You can tell he's excited for cekodok now, can't you?

So we had cekodok for breakfast. Afiq originally wanted to bring a small box of Frosties as his 'bekal' to school today, but changed his mind when he saw I was making cekodok. Even Mariessa wanted to bring some to school.

After school, Afiq told me that the cekodok was really good. Mariessa said, " Memang sedap kan, bang. Kawan- kawan Kakak berebut tadiiii, nak makan cekodok yang Kakak bawak!" Then Afiq said, "Terror la Mama buat cekodok, sedap betul "

It's just cekodok, really. But today, cekodok really made my day.
Labels: 0 comments | edit post
4th October was my last day at work. So I've been a SAHM (that's stay-at-home-mom for those who are wondering) for a little over 3 months now.

I didn't think I could survive the 51-day school holidays, with all 4 kids at home. After all, I am someone who needs her 'me' time more often that anyone I know. But Alhamdulillah, I survived. So did the kids. 😉 Some days are better than the rest, some days are worse.

Come December, I was looking forward to January like never never before!

Don't get me wrong, I love my kids to bits and pieces, but they can drive me up the wall... And I say this in the most loving tone I know how. 😝

Now that the kids are in school, life is just as hectic... But I do get more quite time for myself, Alhamdulillah. This of course depends very much on Muiz's mood in the morning, but he's quite an easy boy so far, Alhamdulillah.

I try as much as I can to wake up very early in the morning, ideally at 4.30.., but so far the earliest I could drag myself out of the bed is at 5. If I could settle everything before 6, that guarantees lazy time between 8.30 to 11.30 a.m. when Afiq, Mariessa and Adreena are at school. By everything I mean breakfast and lunch meals ready, house is clean (definition of clean varies, depends on my mood) and also laundry (most of the time Shahril gets this settled, Alhamdulillah).

I then send Afiq to school, which is something I love doing because this is the time when I can concentrate solely on Afiq. A lot can be talked about in 15 minutes (the school is only 3 kms away, but traffic can be really bad), and I feel that this is my opportunity to get him in the mood for school.

Shahril sends the girls to kindy on his way to work, so I'm basically free until it's time to go and fetch the girls.

When it's time, fetch the girls. Come home. Then out again to fetch Afiq, then home again. Shahril sends Afiq to KAFA after lunch, but if Shahril's extra busy or have meetings elsewhere, I'll send Afiq instead, dragging everyone along with me of course!

3 hours later, we go out again and fetch Afiq.

I'm starting to get tired just writing all these down. 😅

I am lucky Muiz is accepting his carseat very well. On days he doesn't feel like being strapped into his carseat and cries all the way to and fro, I am lucky that after 3 kids before Muiz, I am immuned to kids crying in the car. Haha.

So that's how a day roughly looks like for me. That is of course the 'good' part of it. The not-so-good part involves washing dishes almost non-stop, sweeping the floor countless times, mopping, picking up toys, picking up bowls and spoons which were turned into toys, you get the drift.

Life as a SAHM (with 4 kids), now that I have 3 months experience of it, I can say that it is very, very, VERY tiring.

But to be able to watch my children grow in front of my very eyes... THAT is priceless!


Suddenly in the mood to bake.

Found the recipe at

http://www.secubitgaramnor67.com/2009/07/bun-pandan-berkaya-2.html?m=1


BUN PANDAN BERKAYA

bahan2:
350 g tepung roti (high protein flour)
200 ml air sejuk (dari peti sejuk)
50 g gula halus
1/2 camca teh garam halus
3 camca teh instant yeast
1 camca teh bread improver
20 g serbuk santan
1 camca besar susu tepung
1 biji telur kecil ( guna telur biasa, kacau sedikit dan timbang 40g)
30 g mentega
1 camca teh pandan paste

bahan hias :
Kelapa kering secukupnya (I left this out)
Seri kaya secukupnya

CARA MEMBUATNYA :-)
UNTUK DOH :Masukkan semua bahan2 diatas kecuali bahan hias ke dalam Bread Maker dan pilih setting untuk doh, tekan "on" dan tunggu hingga siap...
Tumbuk dok untuk membuang udara. Bahagikan kan doh kepada 16 bahagian yang sama besar, bulat2kan doh dan susun. Tutup dengan kitchen towel bersih dan biar naik selama 45 minit - 1 jam.
Spray sedikit air atas permukaan roti, tabur kelapa kering dan paipkan serikaya (masukkan seri kaya dalam plastik bersih, dan gunting sedikit muncungnya) atas roti tadi...ikut lah style memasing yeaa...
Bakar dalam oven yang telah dipanaskan pada suhu 180C selama 20 - 25 minit...Bila masak, keluar dari tin dan sejukkan sepenuhnya atas jaringan....Lepas tu boleh lah makan.

The dough comes out really soft, I wondered if I measured the ingredients wrongly. It was tough trying to work with it, but the end result came out really soft and fluffy. A keeper, this.

I took it out of the oven 5 minutes before Afiq had to go for his KAFA. He brought 2 to school, Alhamdulillah.


This is the first picture taken with my new toy. :) Just thought I should jot that down. :)

I seem to have lost the mojo to write, which is sad because I feel like I have so many things to write about now that I'm watching my children grow in front of my eyes.

Hopefully I am able to write more from now on, InsyaAllah